
| 일 | 월 | 화 | 수 | 목 | 금 | 토 |
|---|---|---|---|---|---|---|
| 1 | 2 | |||||
| 3 | 4 | 5 | 6 | 7 | 8 | 9 |
| 10 | 11 | 12 | 13 | 14 | 15 | 16 |
| 17 | 18 | 19 | 20 | 21 | 22 | 23 |
| 24 | 25 | 26 | 27 | 28 | 29 | 30 |
| 31 |
- 자바스크립트
- 도커
- 비지니스영어
- 머신러닝
- sap mm
- 자바
- JavaScript
- db
- ABAP
- docker
- 유럽여행
- SAP ABAP
- 노드
- 파이썬
- SAP
- SAP ERP
- Oracle DB
- Mac
- nodejs
- 영어
- node.js
- 오라클 디비
- Python
- Spring Framework
- Programming
- 오라클
- IT
- oracle
- 딥러닝
- Java
- Today
- Total
JIHYUN JEONG
[docker/container/도커/컨테이너] official guide tutorial(Part 1~ 2) 공식가이드 실습 본문
[docker/container/도커/컨테이너] official guide tutorial(Part 1~ 2) 공식가이드 실습
StopHyun 2018. 12. 4. 18:53해당 내용은 Docker 공식 사이트에서 실습한 내용을 정리한 내용 입니다.
The following are the tutorial of docker official guide below what I have done.
https://docs.docker.com/get-started/
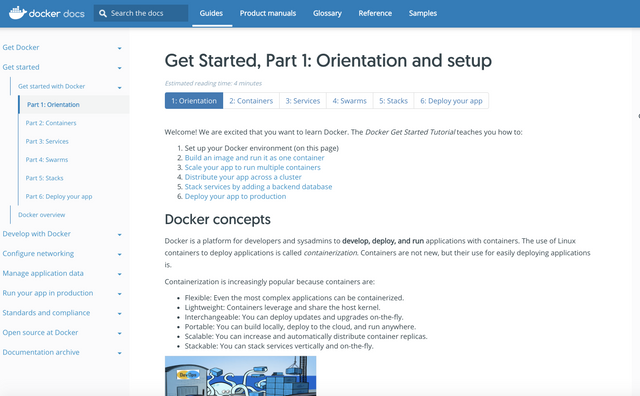
Get Started, Part 1: Orientation and setup
Docker concepts
Docker is a platform for developers and sysadmins to develop, deploy, and run applications with containers. The use of Linux containers to deploy applications is called containerization. Containers are not new, but their use for easily deploying applications is.
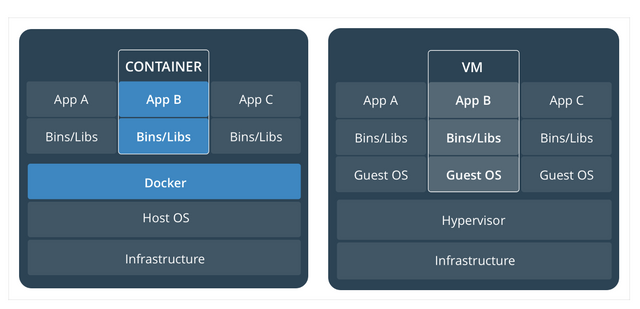
Containers and virtual machines
A container runs natively on Linux and shares the kernel of the host machine with other containers. It runs a discrete process, taking no more memory than any other executable, making it lightweight.
By contrast, a virtual machine (VM) runs a full-blown “guest” operating system with virtual access to host resources through a hypervisor. In general, VMs provide an environment with more resources than most applications need.
Prepare your Docker environment
- Kubernetes on Docker for Mac is available in 17.12 Edge (mac45) or 17.12 Stable (mac46) and higher.
- Kubernetes on Docker for Windows is available in 18.02 Edge (win50) and higher edge channels only.
Test Docker version
- Run
docker --version

- Run
docker info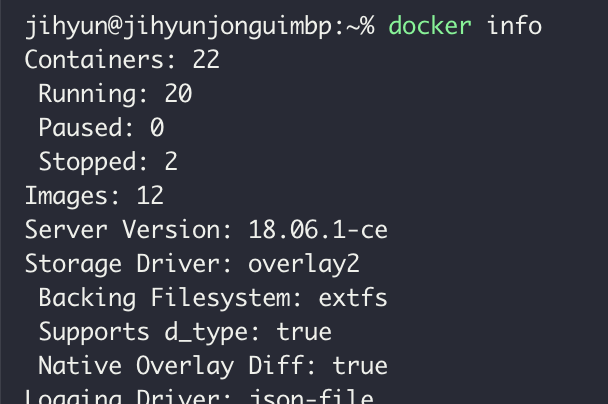
...
Test Docker installation
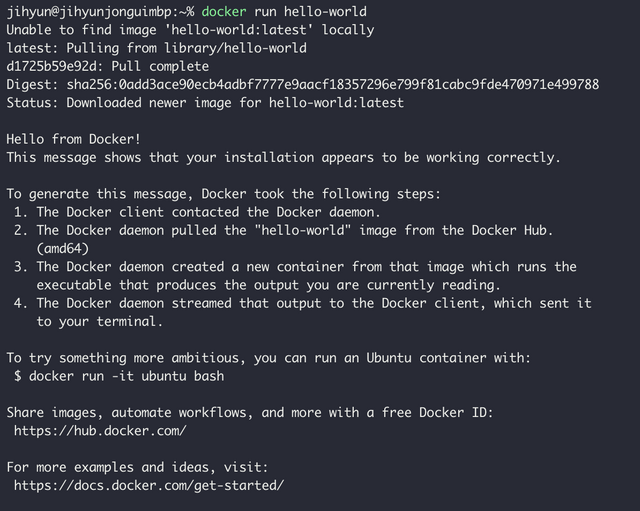
- Test
docker run hello-world
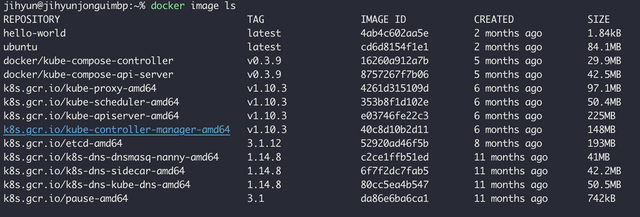
- List the
hello-world
docker image ls
- List the
docker container ls --all
#Get Started, Part 2: Containers
Prerequisites
- Install Docker version 1.13 or higher.
- Read the orientation in Part 1.
Introduction
It’s time to begin building an app the Docker way. We start at the bottom of the hierarchy of such app, a container, which this page covers. Above this level is a service, which defines how containers behave in production, covered in Part 3. Finally, at the top level is the stack, defining the interactions of all the services, covered in Part 5.
- Stack
- Services
- Container (you are here)
Your new development environment
In the past, if you were to start writing a Python app, your first order of business was to install a Python runtime onto your machine. But, that creates a situation where the environment on your machine needs to be perfect for your app to run as expected, and also needs to match your production environment.
With Docker, you can just grab a portable Python runtime as an image, no installation necessary. Then, your build can include the base Python image right alongside your app code, ensuring that your app, its dependencies, and the runtime, all travel together.
These portable images are defined by something called a Dockerfile .
Define a container with Dockerfile
Dockerfile defines what goes on in the environment inside your container. Access to resources like networking interfaces and disk drives is virtualized inside this environment, which is isolated from the rest of your system, so you need to map ports to the outside world, and be specific about what files you want to “copy in” to that environment. However, after doing that, you can expect that the build of your app defined in this Dockerfile behaves exactly the same wherever it runs.
Create an empty directory. Change directories (cd) into the new directory, create a file called Dockerfile, copy-and-paste the following content into that file, and save it. Take note of the comments that explain each statement in your new Dockerfile.
# Use an official Python runtime as a parent image
FROM python:2.7-slim

# Set the working directory to /app
WORKDIR /app

# Copy the current directory contents into the container at /app
COPY . /app

# Install any needed packages specified in requirements.txt
RUN pip install --trusted-host pypi.python.org -r requirements.txt

# Make port 80 available to the world outside this container
EXPOSE 80

# Define environment variable
ENV NAME World

# Run app.py when the container launches
CMD ["python", "app.py"]


This Dockerfile refers to a couple of files we haven’t created yet, namely app.py and requirements.txt . Let’s create those next.
The app itself
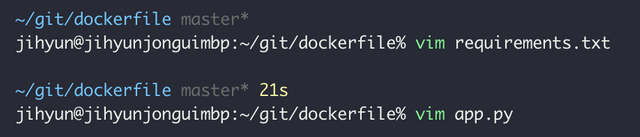
Create two more files, requirements.txt and app.py, and put them in the same folder with the Dockerfile. This completes our app, which as you can see is quite simple. When the above Dockerfile is built into an image, app.py and requirements.txt is present because of that Dockerfile’s COPY command, and the output from app.py is accessible over HTTP thanks to the EXPOSE command.
requirements.txt
Flask
Redis
app.py
from flask import Flask
from redis import Redis, RedisError
import os
import socket

# Connect to Redis
redis = Redis(host="redis", db=0, socket_connect_timeout=2, socket_timeout=2)

app = Flask(__name__)

@app.route("/")
def hello():
    try:
        visits = redis.incr("counter")
    except RedisError:
        visits = "<i>cannot connect to Redis, counter disabled</i>"

    html = "<h3>Hello {name}!</h3>" \
           "<b>Hostname:</b> {hostname}<br/>" \
           "<b>Visits:</b> {visits}"
    return html.format(name=os.getenv("NAME", "world"), hostname=socket.gethostname(), visits=visits)

if __name__ == "__main__":
    app.run(host='0.0.0.0', port=80)
Now we see that pip install -r requirements.txt installs the Flask and Redis libraries for Python, and the app prints the environment variable NAME, as well as the output of a call to socket.gethostname() . Finally, because Redis isn’t running (as we’ve only installed the Python library, and not Redis itself), we should expect that the attempt to use it here fails and produces the error message.
That’s it! You don’t need Python or anything in requirements.txt on your system, nor does building or running this image install them on your system. It doesn’t seem like you’ve really set up an environment with Python and Flask, but you have.
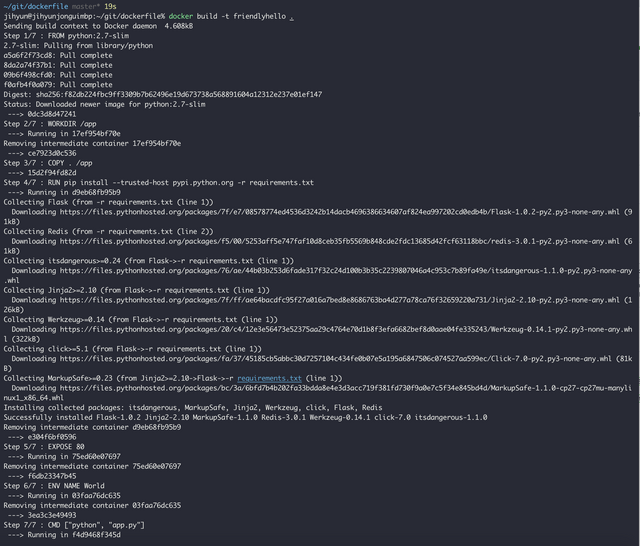
Build the app
We are ready to build the app. Make sure you are still at the top level of your new directory. Here’s what lsshould show:

Run the app
Run the app, mapping your machine’s port 4000 to the container’s published port 80 using -p:
docker run -p 4000:80 friendlyhello
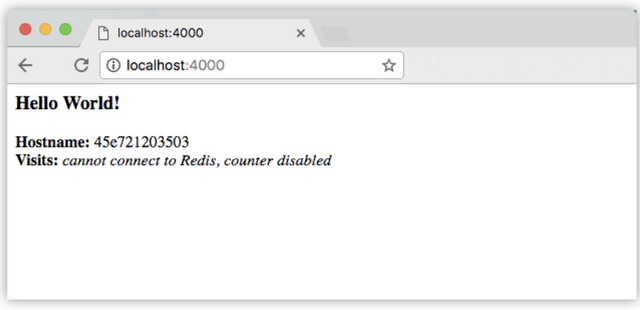
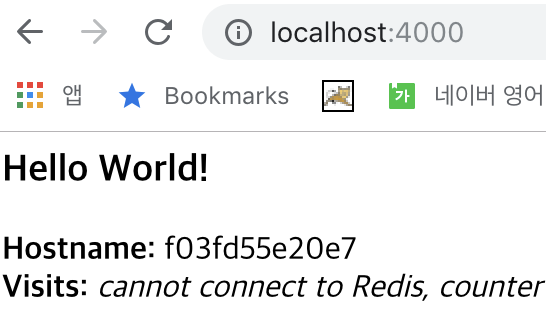
You should see a message that Python is serving your app at http://0.0.0.0:80. But that message is coming from inside the container, which doesn’t know you mapped port 80 of that container to 4000, making the correct URL http://localhost:4000.
Go to that URL in a web browser to see the display content served up on a web page.
Now let’s run the app in the background, in detached mode:
docker run -d -p 4000:80 friendlyhello

You get the long container ID for your app and then are kicked back to your terminal. Your container is running in the background. You can also see the abbreviated container ID with docker container ls (and both work interchangeably when running commands):

Notice that CONTAINER ID matches what’s on http://localhost:4000.
Now use docker container stop to end the process, using the CONTAINER ID, like so:
docker container stop


Share your image
Log in with your Docker ID
- go to https://hub.docker.com/
If you don’t have a Docker account, sign up for one at hub.docker.com. Make note of your username.
Log in to the Docker public registry on your local machine.
And Log in
docker login

Tag the image
The notation for associating a local image with a repository on a registry is username/repository:tag. The tag is optional, but recommended, since it is the mechanism that registries use to give Docker images a version. Give the repository and tag meaningful names for the context, such as get-started:part2. This puts the image in the get-started repository and tag it as part2.
Now, put it all together to tag the image. Run docker tag image with your username, repository, and tag names so that the image uploads to your desired destination. The syntax of the command is:
docker tag image username/repository:tag
For examples:
docker tag friendlyhello jihyunjeong/get-started:part2
Run docker image ls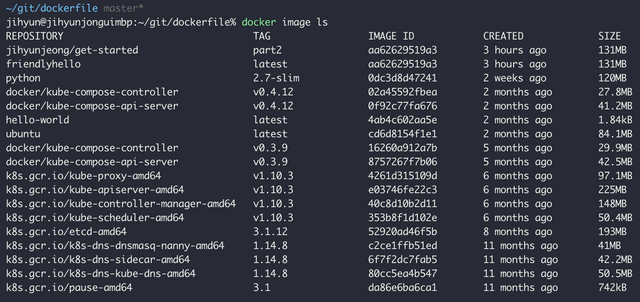
Publish the image
Upload your tagged image to the repository:
docker push username/repository:tag
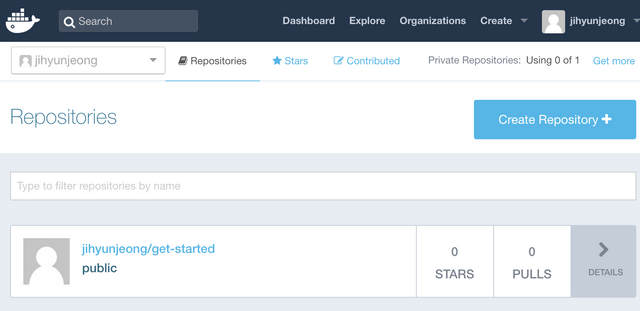
Once complete, the results of this upload are publicly available. If you log in to Docker Hub, you see the new image there, with its pull command.

Pull and run the image from the remote repository
From now on, you can use docker run and run your app on any machine with this command:
docker run -p 4000:80 username/repository:tag
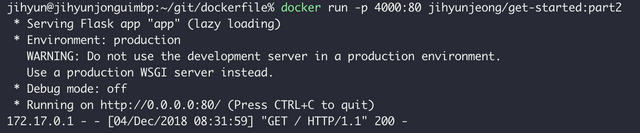
No matter where docker run executes, it pulls your image, along with Python and all the dependencies from requirements.txt, and runs your code. It all travels together in a neat little package, and you don’t need to install anything on the host machine for Docker to run it.
Conclusion of part two
That’s all for this page. In the next section, we learn how to scale our application by running this container in a service.
'Information Technology > Linux&Unit' 카테고리의 다른 글
| MacOS 쉘(shell) 명령어가 먹히지 않는 오류(ls 등 기타 명령어) (0) | 2019.02.20 |
|---|---|
| 리눅스에 디렉토리 만들고 복사할 수 있게 권한주기 (0) | 2018.02.11 |
